
I love the idea of using open source hardware for laboratories. As someone who likes to tinker with his instruments, open source makes a lot of sense. If I build a spectrophotometer from parts, and all of the parts are well documented, I can make modifications and repairs more easily. It also makes sense from a monetary standpoint: I don’t have to pay for lots of support and infrastructure that I don’t want or need.
That being said, there are some disadvantages: there is no service contract associated with an open source instrument. If I buy something and I don’t know how to use it or repair it and it breaks, then I am simply out of luck.
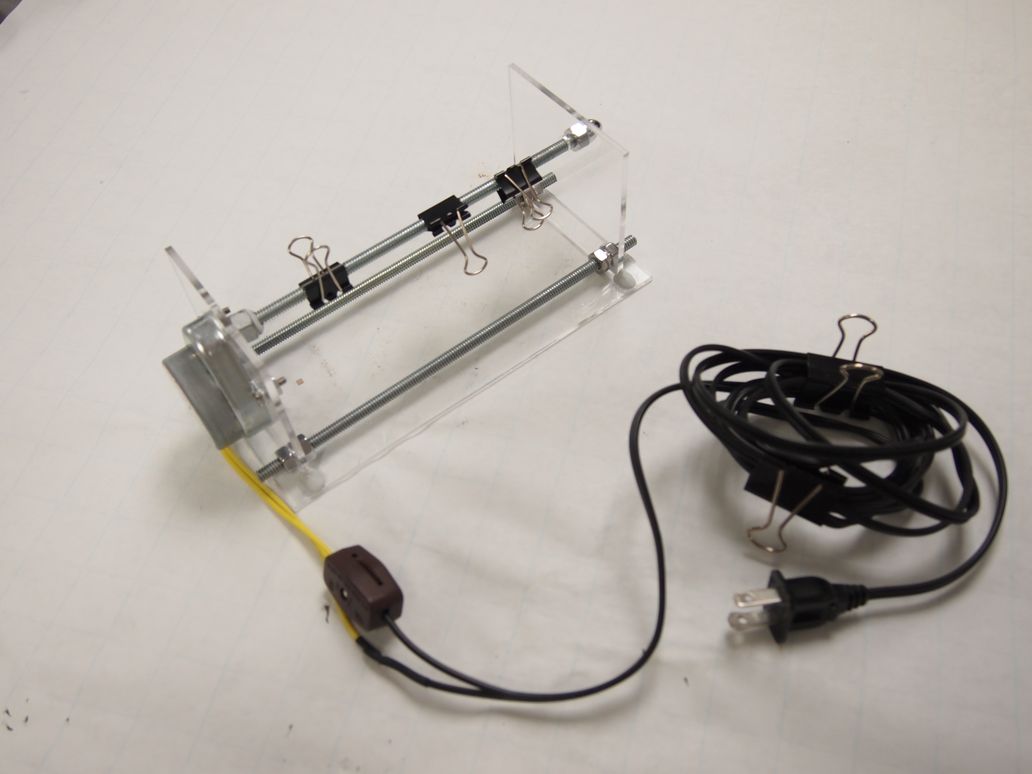
For now it makes the most sense to build simple instruments. I made an Open Source sample rotator for biology/chemistry laboratories. A new rotator for slowly stirring a solution during a reaction can be $300+ (Thermo wants you to request a quote!). I built one for about $50. The whole thing makes one rotation every 10 seconds. I secure vials to the rotating threaded rod using binder clips and/or tape.
 It works about as well as could be desired for a simple tool. There are lots of other examples. I published a short collection of others I made in the Journal of Biological Methods. There are some other great projects out there. One of my favorites is explained in a paper from the Pearce Lab at MTU. It was published in the Journal of Lab Automation. It talks about an open source liquid handling platform. The robots I had access to back in the day were just too intimidating – they were expensive and had a very steep learning curve. These will have a learning curve at first, but might at least be cheap.
Here are some other places that cover open source hardware:
- https://opensource.com/
- http://www.open-electronics.org/
- http://www.oshwa.org/
- http://p2pfoundation.net/Open_Source_Hardware
- http://www.element14.com/community/groups/open-source-hardware
Rotator Build notes:
I ordered the two square pieces and one rectangular piece of acrylic custom laser cut with appropriate holes from ponoko.com (CAD files are also available for cutting or downloading for modification). I also used one piece of threaded rod (.25 inch diameter, 20 threads per inch pitch) from the local hardware store. I cut that into three sections and used 9 nuts and 1 cap nut to secure it to the device. A attached the motor to the acrylic with two small machine screws I found in the lab. I locked the contact point between threaded rod and motor with epoxy paste. I solvent-welded the joints between the rectangle and squares with methylene chloride. I used a little bit of epoxy paste to reinforce the solvent-welded joints.
The switch, motor, and power cord were all ordered from McMaster Carr:
3867K12 Constant-Speed AC Gearmotor 6 rpm At 60 Hz $23.57
14695K91 Inline on/Off Switch for Lamp $ 2.64
7248K22 Power Cord with Two-Blade Plug 18 Gauge Wire, 9′ Long $3.02

You must be logged in to post a comment.